Record Guide mode will help you to create step-by-step guides, SOPs, checklists, etc. After recording, you can customize and add your guides to a portal on your domain. Imagine having all your knowledge base guides in one place and easily shareable with colleagues and clients.
The magic itself is that… You don’t need to worry about taking screenshots or manually writing text descriptions. Go through the process, and our app takes care of the rest. All you need to do is check for accuracy, make necessary changes, and share it with your colleagues or clients.
Nimbus Capture allows you to add screenshots and text descriptions of the actions needed to complete each task. If that’s not enough, you can add a video of the process, additional materials, tables, and more.
Ready to see it in action? Firstly, a short video will show you how the functionality works. We had a task to create a tutorial on the creation of an info block in our client portal, and we did it quickly:
How Does It Work? #
1) Open the desired page.
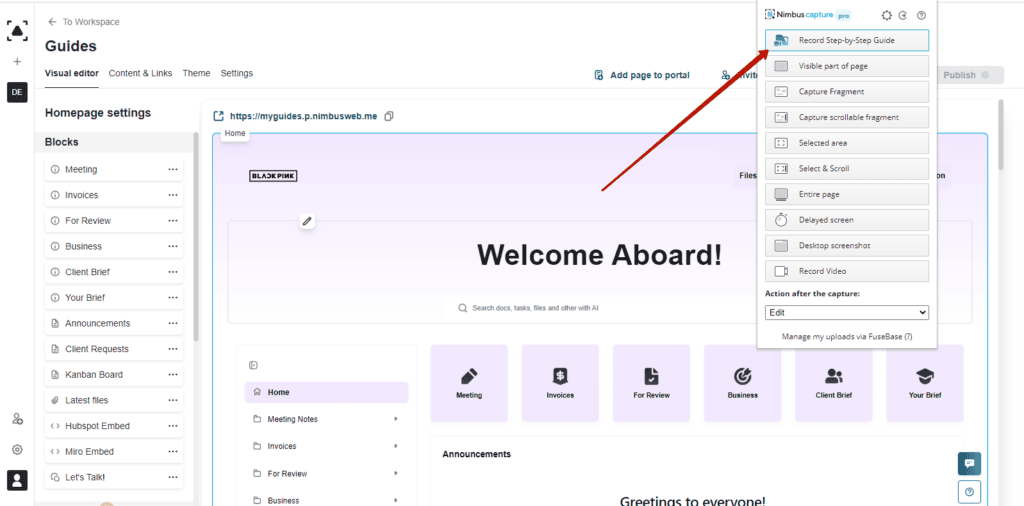
2) In Nimbus Capture, click the Record Step-By-Step Guide button:
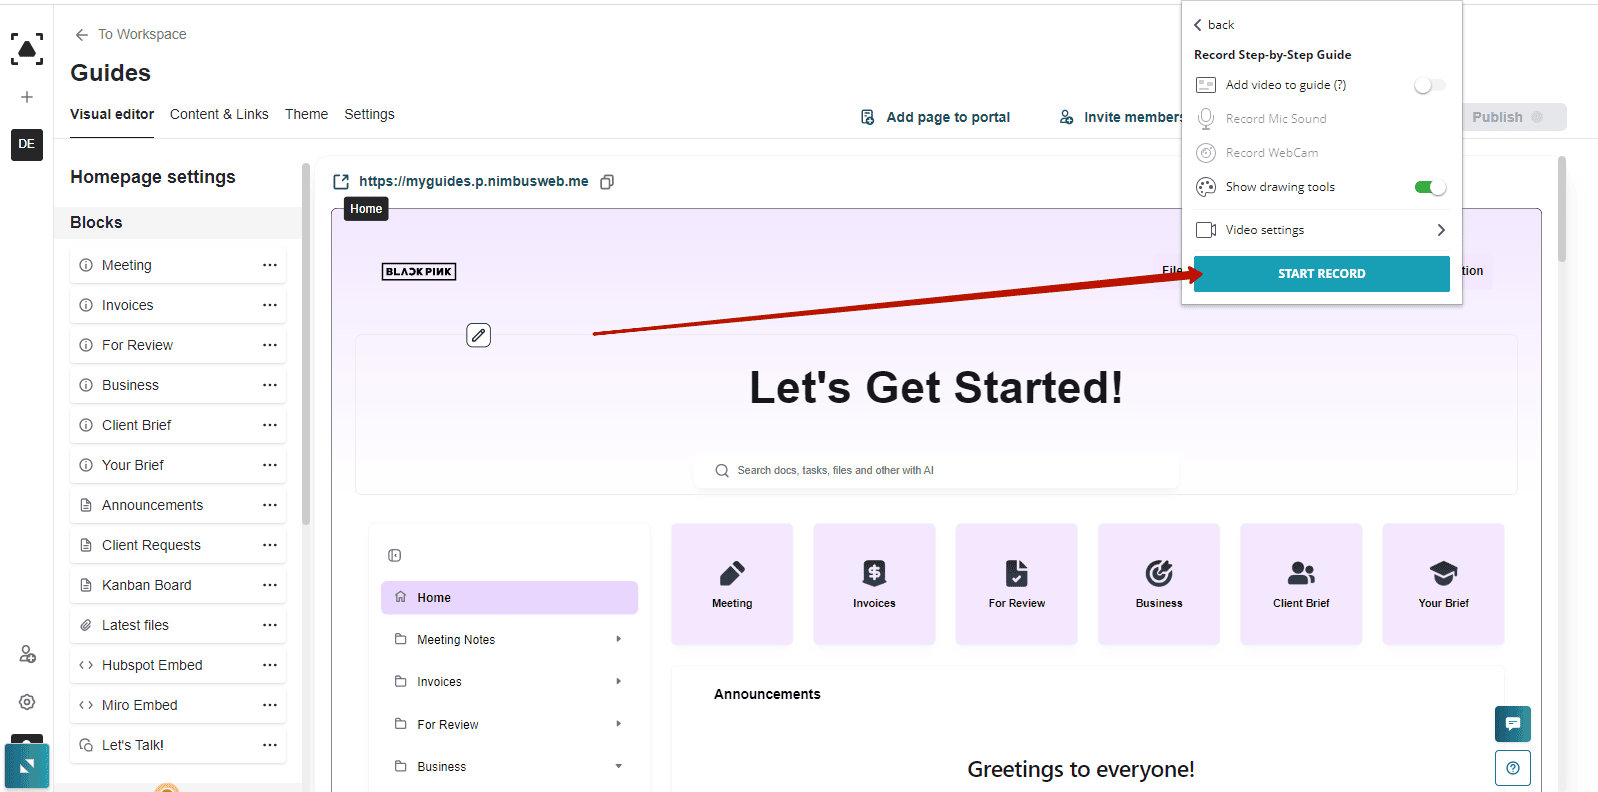
3) Click on Start Record:
4) Perform the actions you want to create a tutorial about. In our case, we recorded the process of adding an Info Block to the FuseBase portal.
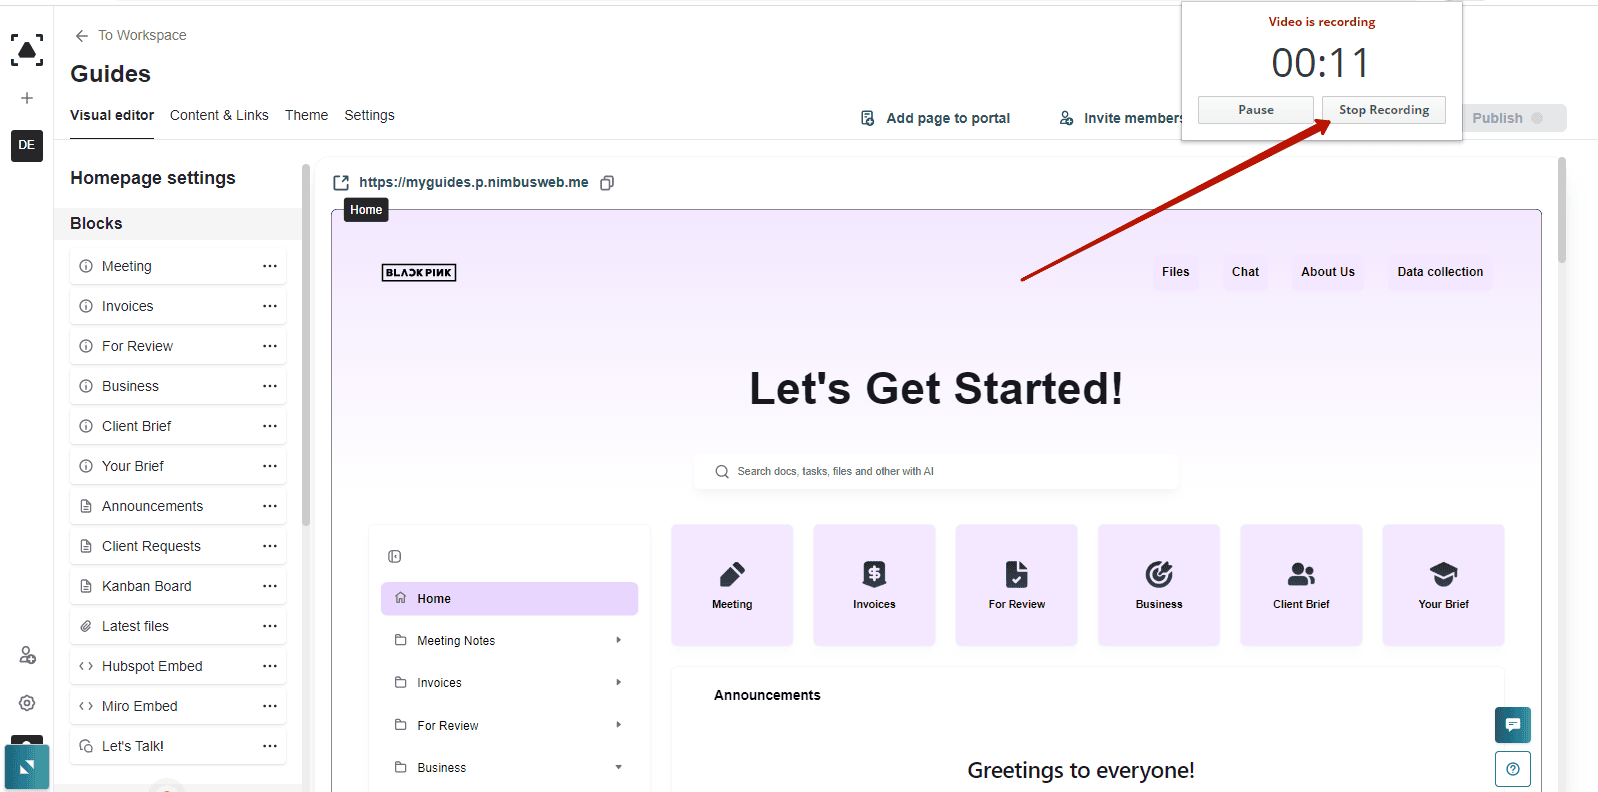
5) Next, click the Stop Recording button, and that’s it… you get a finished step-by-step tutorial!
With Nimbus Capture, you can create tutorials in a fraction of the time it used to take. The tool automatically captures screenshots and describes your actions, leaving you with a ready-to-go tutorial. Simply share the page with your colleagues or add it to your knowledge base. What used to be a time-consuming task now takes just minutes!
Curious To Learn More? Check out Our Tailored Tips! #
Add videos to your guides #
In addition to screenshots, you can record a video, which will also be added to the tutorial:
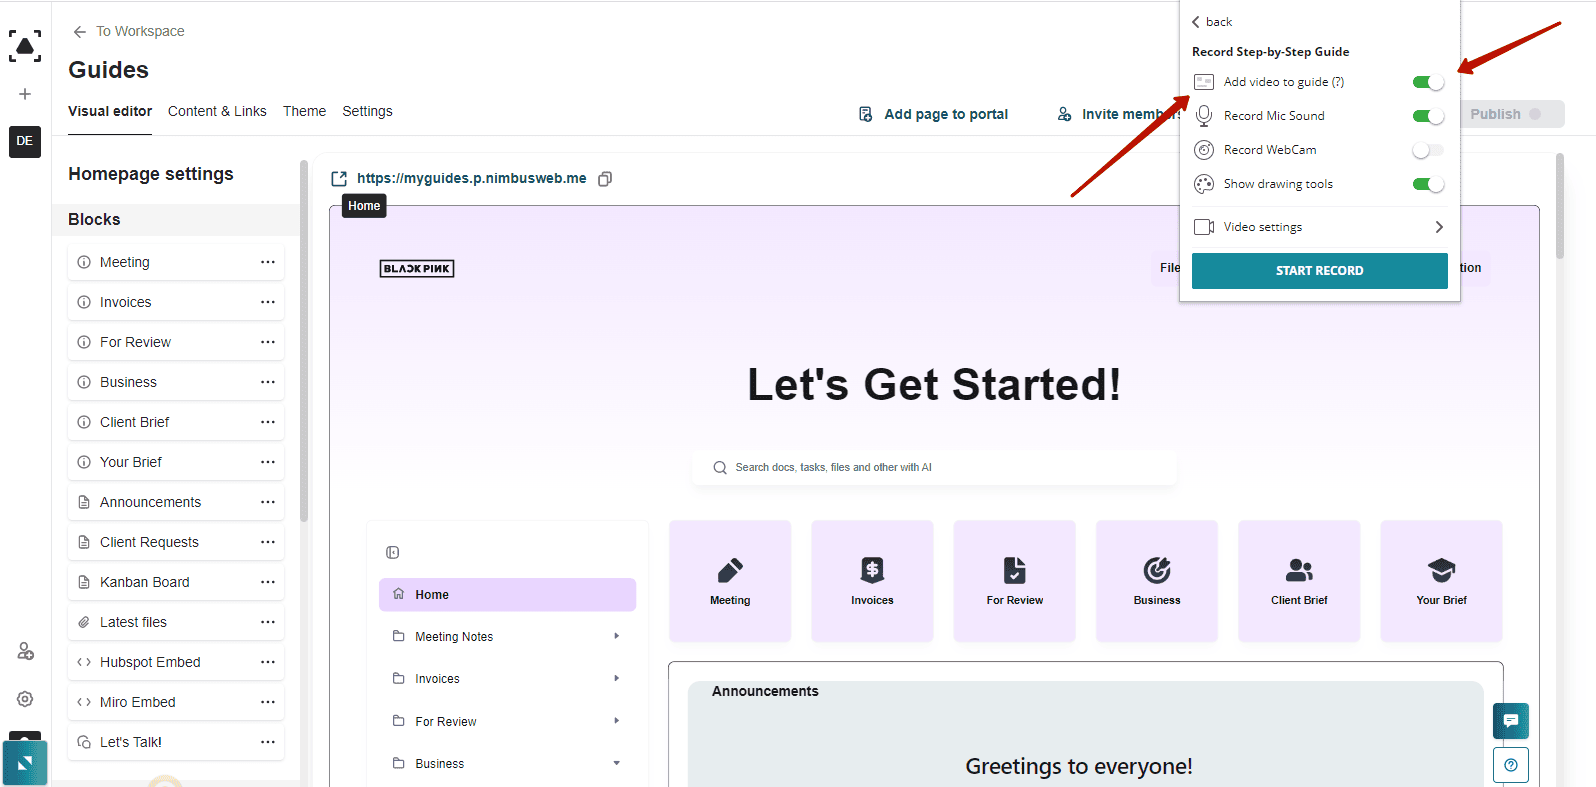
You can also give clear and concise instructions to your guide by turning on your microphone and webcam and using your voice!
How can I modify the current steps or include new ones? #
You can easily make changes if you find errors or something that needs updates in your guide. You have the following options:
- To delete an unnecessary step, use the option in the menu:
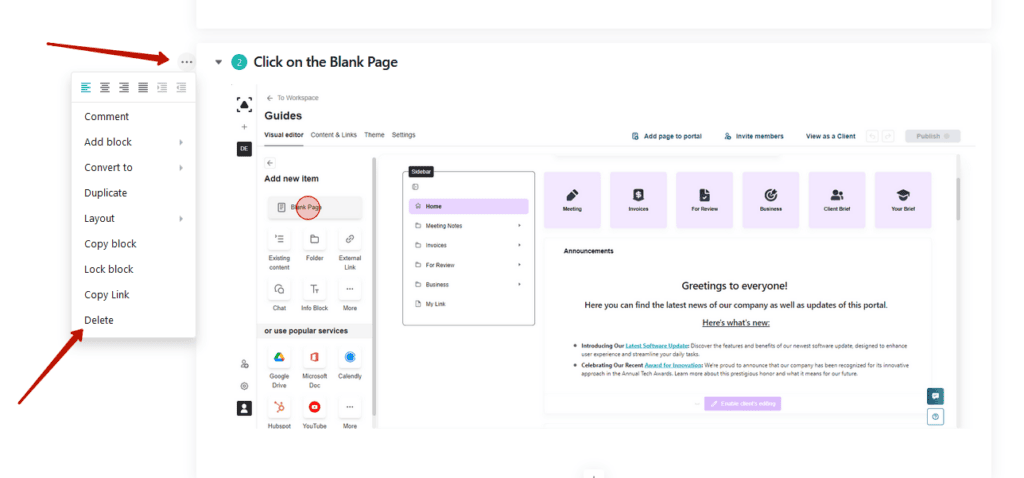
- To modify the text of a step or add more information, click on the step name or its content and add the desired information. The editing possibilities are endless, and you can find more information about our Editor here: WRITING AND EDITING.
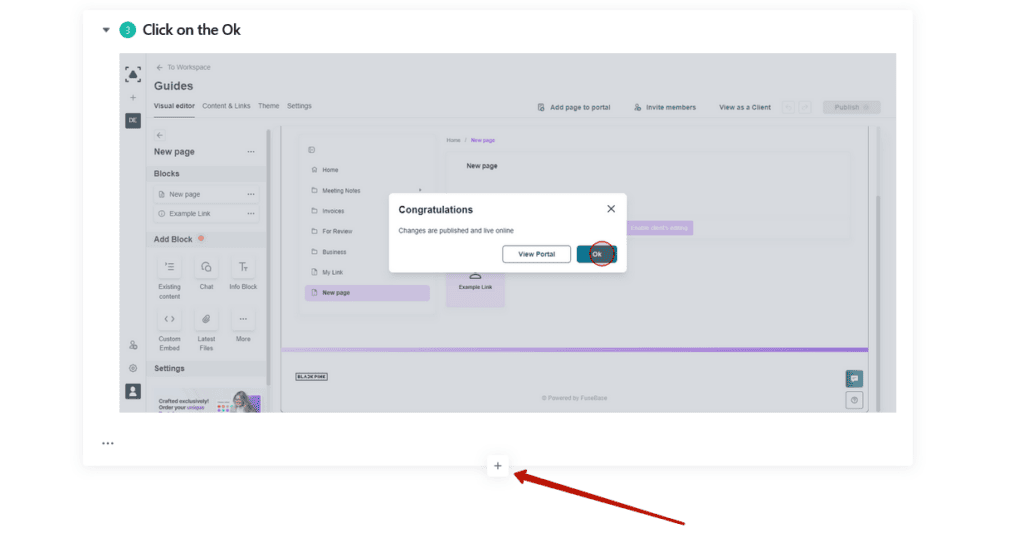
- To create a new step, click on the + button.
Let’s share! #
You can quickly share the tutorial with a teammate or client by using the Share option:
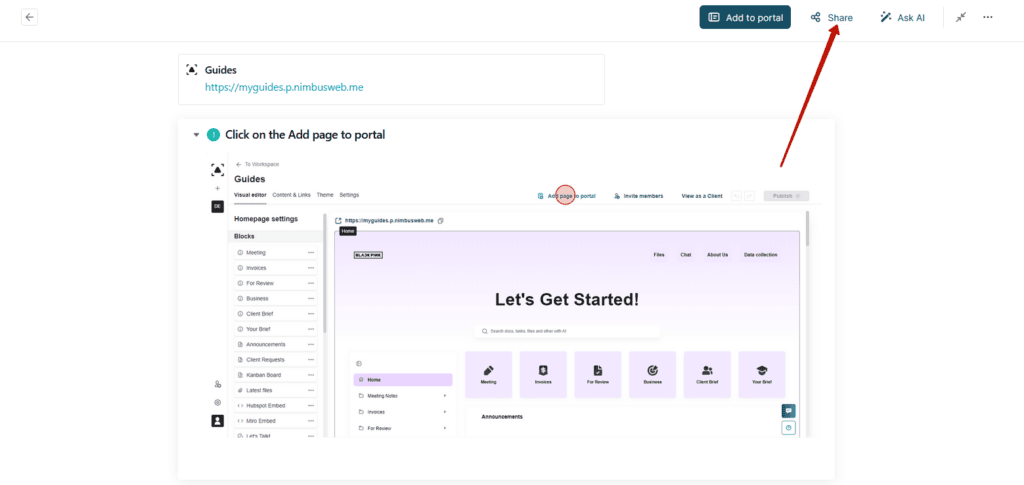
You can secure your guide’s public link with a password using a CNAME connection. It’s the perfect way to host your guides on your sub-domain while reinforcing your brand image. Read more about CUSTOM SUBDOMAINS (CNAME).
Create knowledge bases #
You can use Portals to create knowledge bases with your guides quickly. Portals are mini-sites with your design, widgets, and other handy stuff. Portals can be public and private (you can only open them by invitation). Generally, they are very convenient and helpful; you can read more about them and their features in the CLIENT PORTALS GUIDE.
Setting up your portal is the first step to building a knowledge base for your guides. Here’s your quick guide on how to create your first portal.
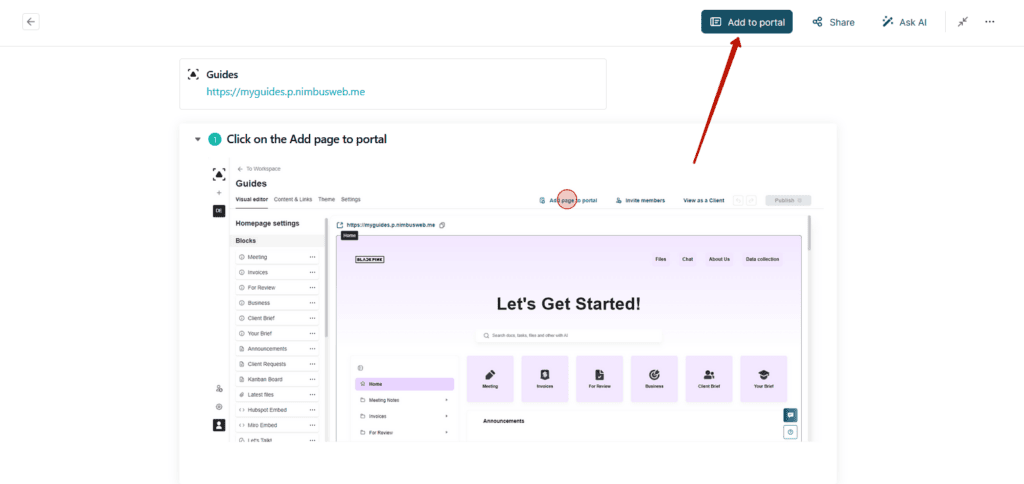
After successful creation, click “Add to portal” to add your guide instantly. Yes, it is as quick and easy as creating a guide.
Don’t limit yourself! #
You can customize the appearance of your guide and add all the features you need with our advanced Editor. From embeds like YouTube videos or Google Slides to your files, tables, or code blocks, you can give your guide the look and feel you want! Learn more about the Editor’s capabilities here – WRITING AND EDITING.
Experience the convenience of guide recording today!


